An awesome update is in the works, and by in the works I mean it's in the oven.
This should give you a hint
Monday, March 23, 2009
Saturday, March 21, 2009


Wednesday, March 18, 2009
Vanilla Ice Cream
After months of testing in my secret underground laboratory I've finally cracked the secret to the perfect vanilla ice cream. Now what you're going to need is 2 5 liter graduated cylinders, a street urchin apprentice that you keep in the basement and feed scraps, and the leaves of the rare Silverthorn plant, picked at the peak of ripeness under a full moon. A sweet beard, and performing a complex interpretive dance also helps, but is not strictly necessary.

Artist's interpretation of me making ice cream.

Artist's interpretation of me making ice cream.
Now, as an alternative you can just follow the recipe for Vanilla Bean Ice Cream in the instruction book that comes with your Cuisinart ice cream maker.
Necessary ingredients:
1 1/2 Cups Whole Milk (or 2%)
1 1/2 Cups Heavy Cream
1 Whole Vanilla Bean
2 Large Eggs
3 Large Egg Yolks
3/4 Cups sugar
 Figure 1.
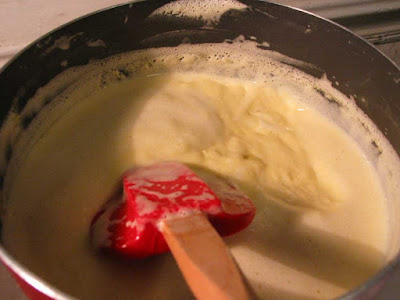
Now comes the tricky part. Well it's not all that tricky, but this is the step that makes or breaks the ice cream (literally). What you've got to do now is combine your hot cream mixture, with your egg and sugar mixture. The trick here is.. if you pour very hot cream over egg yolks, you know what you're going to get.... and let me tell you right now you do NOT want little chunks of scrambled egg floating in your ice cream. That would be your literal "breaking" of your custard (which is what this really is), when the egg curdles, and then separates from the cram.. leaving egg floating in your cream.
So the only way to combine these two liquids, without that happening is combining them slowly, and with a lot of stirring. Slowly pour 1 1/2 cups of your cream mixture into the bowl with your egg mixture, whisking all the while (I use my electric mixer, much easier).. If you think it's getting too hot too fast, slow down and mix for a while. Once the egg mixture is brought up to a reasonable heat, transfer the entire mixture back to the sauce pot with the remaining cream.. again, not too quickly, and with lots of stirring.
The next step can be equally treacherous, you've got to bring the whole mixture back up to heat so the custard can thicken, but not so hot as the egg with curdle. Turn on the heat, medium low, and stir as it reheats. An instant digital thermometer is a GREAT help here (like $10.. you should have one). The minimum you're looking for is about 150 degrees, because you need to make sure you kill any nasty stuff that is in those raw egg yolks. Around 170-180 degrees you should notice a pretty significant thickening in the custard. This is cooking alchemy at work, ad though there is probably an ideal temperature to bring your custard up to, the old custard moniker "until it coats the back of a spoon" is usually good enough. Absolutely do NOT bring it up past 185 unless you want scrambled eggs in your ice cream... Watch this very closely, and always error on the cool side, as opposed to the hot side (as long as you're above 150).
If any food-types feel like flipping through a Harold McGee book to find out the actual temperatures for thickening custard I would be appreciative.
TLDR VERSION: Don't bring this to a boil unless you like egg ice cream.
Cool your Mixture until it's just above freezing, a bowl in the fridge / freezer with plastic wrap directly on top of the custard (touching it) is the best method.. this will make the churning process easier.
Transfer Ice cream to ice cream maker, turn on, and stare transfixed into your machine for the next 25-30 minutes as ice cream is created in front of your very eyes!


This stuff doesn't even need a topping it's so good. Mind blowingly, crazy flavor explosion good. Seriously.
Don't let this recipe scare you, despite this post's epic length, and abundant warnings this is actually a very easy recipe. Easy enough that I think I'll bring back my old defunct ratings system.
Difficulty 6/10 - Potential problems with the eggs curdling, other than that.. easy.
Taste aka deliciousness - 10 / 10 As good as a banger in the mouth, or here in the colonies, a sausage in the mouth.
Necessary ingredients:
1 1/2 Cups Whole Milk (or 2%)
1 1/2 Cups Heavy Cream
1 Whole Vanilla Bean
2 Large Eggs
3 Large Egg Yolks
3/4 Cups sugar
 Figure 1.
For those of you who's lives do not revolve around cooking, these are vanilla beans. They're the 2nd most expensive spice in the world (after saffron), and are what stuff like vanilla extract comes from. You can actually get them pretty cheaply from Kitchen Window. They are key in this recipe, accept no substitutes. To properly use a vanilla bean, split it down the center and then scrape out the vanilla seeds on each half of the bean with a knife. The seeds are what will give the ice cream the deep, rich flavor that you can't get with any other ingredient. I tried to take pictures of this step, but the seeds are too small, and my kitchen is too dark for my camera.. look it up!
 Vanilla pod not shown.. but it's in there.
 Vanilla pod not shown.. but it's in there.
Your first step is to scrape the seeds from the vanilla bean into the cream, and then drop the 2 halves of the bean into the cream. Steep the vanilla bean in the cream and milk at medium heat in a medium saucepan for about 30 minutes, never bringing it past a light simmer. Watch this carefully, stirring often and scraping the sides of the pan with a spatula. At the end of the 30 minutes, remove the 2 halves of the bean, leaving only the heavily vanilla flavored cream.
A note on the cream: The half cream, half whole milk is entirely variable. Obviously the more cream you use, the richer the ice cream will be. I've tend to use whatever I have on hand, and usually end up using a mix of heavy cream and skim milk. I've also used entirely half and half. This is a good way to cut fat, but beware, the less fat in the milk/cream mixture the harder it will freeze. An ice cream made out of nothing but skim milk would be a white colored brick of ice once re-hardened.. not too appetizing. Experimentation is the key here.


In the meantime, mix your 3 yolks, and 2 full eggs in with 3/4 of a cup of sugar until it is smooth and creamy.. a couple of minutes. I realize my picture doesn't show enough eggs, because I originally misread the recipe, and only added 3 eggs total.. it still turned out great. The amount of eggs can actually be changed around quite a bit, from all yolks, all the way down to no egg at all (but that's another recipe). After some experimentation I've settled on using 3-5 egg yolks only, the whites of the eggs tend to froth up into a foam that doesn't incorporate easily back into the ice cream, so I cut them altogether.

Now comes the tricky part. Well it's not all that tricky, but this is the step that makes or breaks the ice cream (literally). What you've got to do now is combine your hot cream mixture, with your egg and sugar mixture. The trick here is.. if you pour very hot cream over egg yolks, you know what you're going to get.... and let me tell you right now you do NOT want little chunks of scrambled egg floating in your ice cream. That would be your literal "breaking" of your custard (which is what this really is), when the egg curdles, and then separates from the cram.. leaving egg floating in your cream.
So the only way to combine these two liquids, without that happening is combining them slowly, and with a lot of stirring. Slowly pour 1 1/2 cups of your cream mixture into the bowl with your egg mixture, whisking all the while (I use my electric mixer, much easier).. If you think it's getting too hot too fast, slow down and mix for a while. Once the egg mixture is brought up to a reasonable heat, transfer the entire mixture back to the sauce pot with the remaining cream.. again, not too quickly, and with lots of stirring.
The next step can be equally treacherous, you've got to bring the whole mixture back up to heat so the custard can thicken, but not so hot as the egg with curdle. Turn on the heat, medium low, and stir as it reheats. An instant digital thermometer is a GREAT help here (like $10.. you should have one). The minimum you're looking for is about 150 degrees, because you need to make sure you kill any nasty stuff that is in those raw egg yolks. Around 170-180 degrees you should notice a pretty significant thickening in the custard. This is cooking alchemy at work, ad though there is probably an ideal temperature to bring your custard up to, the old custard moniker "until it coats the back of a spoon" is usually good enough. Absolutely do NOT bring it up past 185 unless you want scrambled eggs in your ice cream... Watch this very closely, and always error on the cool side, as opposed to the hot side (as long as you're above 150).
If any food-types feel like flipping through a Harold McGee book to find out the actual temperatures for thickening custard I would be appreciative.
TLDR VERSION: Don't bring this to a boil unless you like egg ice cream.
Cool your Mixture until it's just above freezing, a bowl in the fridge / freezer with plastic wrap directly on top of the custard (touching it) is the best method.. this will make the churning process easier.
Transfer Ice cream to ice cream maker, turn on, and stare transfixed into your machine for the next 25-30 minutes as ice cream is created in front of your very eyes!


This stuff doesn't even need a topping it's so good. Mind blowingly, crazy flavor explosion good. Seriously.
Don't let this recipe scare you, despite this post's epic length, and abundant warnings this is actually a very easy recipe. Easy enough that I think I'll bring back my old defunct ratings system.
Difficulty 6/10 - Potential problems with the eggs curdling, other than that.. easy.
Taste aka deliciousness - 10 / 10 As good as a banger in the mouth, or here in the colonies, a sausage in the mouth.
Thursday, March 12, 2009
Beer Bread
Do you like beer? Do you like bread? Do I have a recipe for you. This is the easiest, and some of the best bread I've made yet.. and it's infinitely customizable.


Ingredients:
- 3 cups all purpose unbleached flour
- 3 teaspoons baking powder
- 1 teaspoon salt
- 1/4 cup sugar
- 1 (12 ounce) can beer
- 1/4 cup melted butter
Directions:
- 1. Preheat Oven to 375
- 2. Mix dry ingredients with beer in seperate bowl.
- 3. Pour mixture into a greased (or non-stick sprayed) loaf pan. (don't skip this or you'll never get your bread out)
- 4. Even mixture out in pan and pour melted butter over top of dough.
- 5. Bake for 50min to 1hr, or until the top and sides become brown and crusty. Let cool for 10 minutes before serving.
That's it! No kneading, no proofing, not even any yeast - the yeast in the beer is used as the levener, the baking powder gives it an extra kick.
Variations:
Butter: I used 2 tablespoons instead of 1/4 of a cup, and it was still delicous. I wouldn't recommend completely cutting it out, but you definately don't need to use the full amount.
Beer: Different beers will give the bread different flavors, I recommend using something with a strong flavor to give the bread a nice tangy flavor. I've tried Summit EPA, and Pauliner Amber - both were excellent, but the amber came through more in the finished bread.
Whole Wheat Beer Bread: 2 Cups Whole wheat flour, 1 cup All Purpose.Cut down the sugar if you don't want it quite so sweet.
Beer Cheese bread: Add 1 to 1.5 cups of shredded cheese to dough mix.
Now I pose you a question.
Which food goes well with beer?
The correct answer is Nachos.
So I present to you my jalapeno-cheese-beer bread photo essay. Delicious.


Saturday, February 14, 2009
Butter nuts
It is the season for winter squash. Acorn, butternut and spaghetti squash are abundant and cheap right now and you can make them into just about anything.
That said, I hate squash, hate hate hate it. Now I have nothing against it, I really want to like it, because it's abundant, cheap and can be made into just about anything but the flavors have never really been my favorite. I can enjoy a butternut squash soup now and again, but generally I stay away from it.
Last week I decided that with my new found love of roasting all vegetables, I had to give them a second chance. It only cost me about $1 anyway. The roasting process itself is fairly self explanatory, but I admit I had no idea how to actually prepare one for cooking.
So here is a photo exploration of preparing the most phallic of all vegetables for roasting, the butternut squash.


 Cut off the top and bottom so it will stand
 Olive oil, kosher salt and pepper.
 425 F for about 30 min or until crispy.
Verdict: This was okay, a lot better than squash I've had in the past. I'm sure actual squash lovers would enjoy it a lot more than I did. It actually was nice leftover, served with huevos rancheros as kind of of a pseudo plantain (another thing I don't like).
I need to find another squash recipe though, I bought 2 of the damn things and it's sitting in my pantry staring at me, imploring at me to use it before it goes bad.
I need to find another squash recipe though, I bought 2 of the damn things and it's sitting in my pantry staring at me, imploring at me to use it before it goes bad.
Wednesday, February 11, 2009
Couscous Pie
This is the ultimate flexible leftover-user recipe. I adapted this from a polenta pie I made several weeks ago, substituting whatever I had in my fridge or my pantry.
Begin by cooking your couscous so it will have a chance to cool, approx a 1:1 ratio of couscous to water or flavorful liquid (I used chicken broth). Let cool and then dish into a pie pan. Form it up as best you can into something like a pie crust. I didn't get too fussy with this step, but I did try to compress it as much as I could so it would stay together. I put the crust into a 400 degree oven for about 10 minutes before I put in the ingredients, but I don't think it's absolutely necessary.


Begin by cooking your couscous so it will have a chance to cool, approx a 1:1 ratio of couscous to water or flavorful liquid (I used chicken broth). Let cool and then dish into a pie pan. Form it up as best you can into something like a pie crust. I didn't get too fussy with this step, but I did try to compress it as much as I could so it would stay together. I put the crust into a 400 degree oven for about 10 minutes before I put in the ingredients, but I don't think it's absolutely necessary.


Saute your ingredients before they go into the pie, to mix their flavors and soften them up. I went with Onions and Kale, and after they had softened up I added a can of tomatoes (Better than fresh this time of year), black beans, garlic, green beans, and some assorted seasoning. Feel free to use whatever you want, just try to keep it relatively dry or it will saturate the bottom layer of couscous.


Take your crust out of the oven and fill with ingredients.. but not too full. At this point you can either bake it as is, or cobble together some sort of pseudo couscous crust. I chose the latter, and I'm really glad I did.


Bake at 400, for about 30 minutes, or until the couscous on top starts to brown.
It's not going to hold together very well, but that doesn't matter.. just scrape it out as best you can and top it preferably with some decent parmigiano reggiano, but any sort of strong cheese would do.. it really brings the flavors together. The couscous on top should be crispy and delicious, and the "crust" should hold together fairly well.
This recipe works even better with cornmeal or polenta, so use it if you have it.

Cooking time start to finish. About an hour, with 30 minutes of that being in the oven.
Wednesday, February 4, 2009
The story of an impusive buy
Self control is not one of my strengths, especially when it comes to new cooking toys. I own a rice cooker, a digital scale, 2(!) sets of measuring spoons, an immersion blender, hand mixer, a George Foreman grill... even a magic bullet blender! So what do you think I did is when I spotted a brand new toy for the very reasonable cost of $39 at a local housewares store?
Why i brought it home of course.


Why i brought it home of course.


The only down side to this particular impulsive buy is that I can't immediately go home and start playing with it, I had to let the bucket freeze overnight. That night I dreamed of the many delicious flavors I would concoct.. Strawberry, Chocolate, Strawberry Chocolate!, Coffee, mint chip...bacon? chicken? chicken and bacon topped with gravy ice cream? who knows where this could take me.


My ice cream creations will be a terrible hybrid of art and science, half Bob Ross, half Dr. Frankenstein. Soon my creations will be unleashed upon the world... and I'll blog about it.
Subscribe to:
Posts (Atom)

