 I wish I could take credit for this
Wednesday, January 28, 2009
Epic Fail
My cooking failures are far more interesting than my successes. They will be posted in due time.
 I wish I could take credit for this
I wish I could take credit for thisSunday, January 25, 2009
Roasted Vegetables
It's recently come to my attention that I have at least one more person reading this blog than I had previously thought. Welcome... I think this brings the total to a half dozen at least, I'll try not to disappoint. I will also put forth exactly 4.5% more effort into each post, starting tomorrow.
I have a real passion for food literature, and recently there have been an abundance of very good books about food. My obsession started with Michael Pollan's "The omnivore's dilemma", and continued on to his other books, as well as whatever else I can get my hands on. (recommendations anybody?) In fact, I've gotten to the point where the cooking section of my book collection rivals the science, and politics sections. In addition to being a pain in the ass to pack up whenever I move, these books have a real impact on what I cook.
The most positive impact has probably come from the aformentioned Omnivore's dilemma, an excellent book even if you're not that in to cooking. Everybody eats, and I think that everyone should become more aware of what is going on behind the scenes of big agriculture, and big grocery. The book is a bit of a slow burn, with the first section dealing very excluslivly with corn and soy, the two big crops of this country, but it quickly ties it back in to our whole food system. It's quite eye opening to know just how much corn and soy product go into the food that you eat every day. Michael Pollan boils the book down to the slogan "eat food, not too much, mostly plants". During the summer I tried to follow these simple instructions, and for a time I suceeded. An abundance of fresh ingredients in the summer makes this a lot easier than in the winter, when much of the fresh produce in the stores is of lower quality, or is shipped from very far away. Winter makes most of us crave warm, starchy comfort food as well, making it even harder.
I recently picked up Mark Bittman's new book "Food Matters - A guide to conscious eating", and I think it's convinced me to give the idea another go. His philosophy is the same basic one as Pollan's, without the catchprase. Basically it's an elmination of most of the processed foods, refined sugars and starches in your day to day diet. Now I've never been big on the processed food anyway, but I'm an absolute fiend for pasta and bread, especially considering I make so much of it myself. Now this isn't a "diet", or any sort of deprivation based food plan, just a gradual shift to making plants the main focus of more dishes. One of my newest loves is roasting vegetables; roasting a piece of broccoli or a parsnip or other hearty vegetable at a high heat will caramalize the exterior and give it a flavor and texture that you will never get with the more traditional preparation methods of steaming or (ick) boiling vegetables.
Here are two roasted vegetables which I used as the main component of the dish.

Preparation method:

Brussel sprouts


I have a real passion for food literature, and recently there have been an abundance of very good books about food. My obsession started with Michael Pollan's "The omnivore's dilemma", and continued on to his other books, as well as whatever else I can get my hands on. (recommendations anybody?) In fact, I've gotten to the point where the cooking section of my book collection rivals the science, and politics sections. In addition to being a pain in the ass to pack up whenever I move, these books have a real impact on what I cook.
The most positive impact has probably come from the aformentioned Omnivore's dilemma, an excellent book even if you're not that in to cooking. Everybody eats, and I think that everyone should become more aware of what is going on behind the scenes of big agriculture, and big grocery. The book is a bit of a slow burn, with the first section dealing very excluslivly with corn and soy, the two big crops of this country, but it quickly ties it back in to our whole food system. It's quite eye opening to know just how much corn and soy product go into the food that you eat every day. Michael Pollan boils the book down to the slogan "eat food, not too much, mostly plants". During the summer I tried to follow these simple instructions, and for a time I suceeded. An abundance of fresh ingredients in the summer makes this a lot easier than in the winter, when much of the fresh produce in the stores is of lower quality, or is shipped from very far away. Winter makes most of us crave warm, starchy comfort food as well, making it even harder.
I recently picked up Mark Bittman's new book "Food Matters - A guide to conscious eating", and I think it's convinced me to give the idea another go. His philosophy is the same basic one as Pollan's, without the catchprase. Basically it's an elmination of most of the processed foods, refined sugars and starches in your day to day diet. Now I've never been big on the processed food anyway, but I'm an absolute fiend for pasta and bread, especially considering I make so much of it myself. Now this isn't a "diet", or any sort of deprivation based food plan, just a gradual shift to making plants the main focus of more dishes. One of my newest loves is roasting vegetables; roasting a piece of broccoli or a parsnip or other hearty vegetable at a high heat will caramalize the exterior and give it a flavor and texture that you will never get with the more traditional preparation methods of steaming or (ick) boiling vegetables.
Here are two roasted vegetables which I used as the main component of the dish.
Broccoli

Preparation method:
- 1. Preheat oven to 425 F.
- Take 1-2 lbs of broccoli and cut into large florets. Make sure broccoli is dry or it won't roast correctly. I didn't even wash mine because I figured the heat would kill anything bad.
- Toss broccoli with a few tbs olive oil, kosher salt, fresh ground pepper and chopped garlic.
- Place broccoli on lined cookie sheet and bake for 20-25 minutes or until it starts to crisp on the outside. I shook the pan once or twice to flip the florets, but I'm not sure it's strictly necessary. Broccoli will crisp and darken.
- When broccoli is done, sprinkle a little more olive oil, the zest of 1 lemon, 1/4 cup of Parmesan cheese, and the juice of 1 lemon over the broccoli. You can also add roasted pine nuts as pictured above. This last step isn't strictly necessary, I made this twice, the 2nd time without the cheese or lemon and it was still very good, but the lemon does give it a nice flavor.

Brussel sprouts

Preparation method:
- Preheat oven to 425 F.
- In a bowl toss sprouts with several tablespoons of olive oil, kosher salt, and freshly ground pepper. Mix to coat the exteriors of the sprouts.
- Lay out sprouts on a cookie sheet.
- Roast for 35-40 minutes, occasionally shaking cookie sheet to turn over sprouts. I had mine in for about 40 and they were a little overdone. Exteriors should look brown and crunchy, almost burnt, and the interiors should be hot and steamy, but not mushy. Pull one out at 35 minutes and cut into it if you're not sure.

Now I've always loved broccoli, but this was unlike any broccoli I've ever had.. crispy, salty, and very delicious it can easily be the main event in a dish. I've never really liked sprouts, but roasting them gives them a wonderful buttery, crispy outer layer, and a creamy interior (the interior of the sprout steams using its own liquid). I served this along side some sauteed cumin and paprika shrimp for a perfect light meal.
Thursday, January 22, 2009
Cavatappi with Sun-Dried Tomatoes and Cannellini Beans
Dinner in a box:
 So having finished season 4 of Dr. Who, and being all caught up on Lost I've been watching season 1 of top chef. I've never really watched any cooking shows, but I find it interesting to see the beautiful food they prepare by just varying the theme of a classic, or basic dish. Most of their dishes seem to have a main focus, with variations on that theme, and then garnishes that play off those flavors. They know how to use their ingredients to full effect, and to really bring out all the flavor. The true test of a cook is when you can make a good dish with what ingredients you have on hand, rather than having to go out and buy specialty ingredients for everything you make. It's the difference between following a recipe, and instinctively knowing what goes with what.
So in that spirit I give you cavatappi with sun-dried tomatoes and Canellini Beans. This is a great weekday dish, everything comes from a jar, a box, or a pantry staple, yet it still manages to taste fresh and surprisingly substantial. It's a great way to avoid too-salty jarred pasta sauces, and could be varied in many ways. It also fulfills my vegetarian recipe promise.
Ingredients:
1 Box Cavatappi pasta - This could be substituted for any other substiantial pasta, but don't try with spagetti. I'll probably try whole-grain penne next time, but the Cavatappi is awesome if you can find it.
1 8oz Jar of sun dried tomatoes - find them pre-julinenned if you want to save yourself the trouble of cutting them yourself. I had to go to byerly's to find the cavatappi and tomatos.
1 Can of cannellini beans (white kidney beans), widely available... and no, the're not pictured above.
Olive oil
Red pepper flakes
Garlic


This recipe makes a lot of food if you make the whole box, so feel free to half the recipe if you don't want that much food, or don't have a skillet big enough to hold a whole box of pasta. I used a 12" non-stick. Top-chef material it is not, but I still think you will enjoy it. Stephen on that show is a total douche bag anyway, don't be like him.. make this for dinner.
Until next time.
 So having finished season 4 of Dr. Who, and being all caught up on Lost I've been watching season 1 of top chef. I've never really watched any cooking shows, but I find it interesting to see the beautiful food they prepare by just varying the theme of a classic, or basic dish. Most of their dishes seem to have a main focus, with variations on that theme, and then garnishes that play off those flavors. They know how to use their ingredients to full effect, and to really bring out all the flavor. The true test of a cook is when you can make a good dish with what ingredients you have on hand, rather than having to go out and buy specialty ingredients for everything you make. It's the difference between following a recipe, and instinctively knowing what goes with what.
So in that spirit I give you cavatappi with sun-dried tomatoes and Canellini Beans. This is a great weekday dish, everything comes from a jar, a box, or a pantry staple, yet it still manages to taste fresh and surprisingly substantial. It's a great way to avoid too-salty jarred pasta sauces, and could be varied in many ways. It also fulfills my vegetarian recipe promise.
Ingredients:
1 Box Cavatappi pasta - This could be substituted for any other substiantial pasta, but don't try with spagetti. I'll probably try whole-grain penne next time, but the Cavatappi is awesome if you can find it.
1 8oz Jar of sun dried tomatoes - find them pre-julinenned if you want to save yourself the trouble of cutting them yourself. I had to go to byerly's to find the cavatappi and tomatos.
1 Can of cannellini beans (white kidney beans), widely available... and no, the're not pictured above.
Olive oil
Red pepper flakes
Garlic
- 1. Start boiling the pasta until it is al dente. (tip, for great pasta use lots of salt in the water)
- 2. In a large skillet add 2 tbsp olive oil, and 2 tbsp of oil from the sun dried tomato jar. Add 4 large sliced cloves of garlic, and brown garlic for approx. 1 minute. Add 1/2 tsp. red pepper flakes and let toast for another 30 seconds.
- 3. Add the sun dried tomatoes, which you've drained and cut into thin strips. Spread them out and let them toast for a minute or two, and then ladle in 1 cup of the pasta water. Simmer until the liquid reduces by half.
- 4. When liquid is reduced add 1 can cannellini beans, drained and rinsed. In addition add salt (unless you salted your pasta water), and 1 1/2 cups more pasta water. Bring water to a slow boil and simmer for 4 or 5 minutes, or until you think you'll end up with a pasta sauce, and not a pasta soup. The pasta will absorb some of the water.

- 5. Once your pasta is al dente, drain it and add to the skillet. Stir around to cover in the sauce, most of the liquid sitting at the bottom should disappear.
- Add half a cup of your favorite cheese (I used parmigiano reggiano), and if you wish, garnish with fresh parsley or a herb of your choice. I had left over cilantro so I used that.

This recipe makes a lot of food if you make the whole box, so feel free to half the recipe if you don't want that much food, or don't have a skillet big enough to hold a whole box of pasta. I used a 12" non-stick. Top-chef material it is not, but I still think you will enjoy it. Stephen on that show is a total douche bag anyway, don't be like him.. make this for dinner.
Until next time.
Let us have a dagger between our teeth, a bomb in our hands, and an infinite scorn in our hearts
Tuesday, January 20, 2009
Monday, January 19, 2009
Panko Pork
Just a quick variation on the Panko chicken I posed earlier. This version uses a flour/spice dredge in addition to the egg and panko.. the flour will help the egg, and thus the panko stick a little better.
Recipe:
2 teaspoons all-purpose flour
1/4 teaspoon salt
1/4 teaspoon onion powder
1/4 teaspoon ground cumin
1/4 teaspoon chili powder
1/8 teaspoon ground red/black pepper
1 teaspoon soy sauce
1 large egg white
1/3 cup panko
2 (4-ounce) boneless center-cut loin pork chops (about 1/2 inch thick)
1 teaspoon canola oil
To prepare pork, preheat oven to 450°.
Combine first 6 ingredients in a shallow dish. Combine soy sauce and egg white in a medium bowl, stirring with a whisk. Place panko in a shallow dish.
Heat oil in a large cast iron skillet over high heat, sear each side of the pork chop for 1.5 minutes, or until it is nicely browned. Remove from heat and let cool.

Verdict: Very good but the chicken thighs are better, probably because they have more fat.
I have vegetarian dishes coming next.. really.
I have vegetarian dishes coming next.. really.
Saturday, January 17, 2009
Brioche will make you strong and tan
I've probably made this brioche more times than any other food, save for perhaps instant ramen, and popcorn. Brioche is a rich butter and egg based enriched bread that rises easily, and works with many different flavors. With this one recipe you can make endless variations, stuff the bread with fruit, chocolate, bacon (seriously), or whatever else you have laying around and you can pretty much guarantee it's going to be delicious. This recipe is the no-knead version.
Ingredients:
1 1/2 cups lukewarm water
1 1/2 tablespoons granulated yeast
1 1/2 tablespoons salt
8 eggs, lightly beaten
1/2 cup honey
3 sticks of unsalted butter, melted
7 1/2 cups unbleached all-purpose flour
Recipe will yield about 4 lbs of dough. Feel free to half or quarter this recipe, though it will result in halving or quartering the amount of delicious bread you'll end up with.
 Brioche will make you healthy.


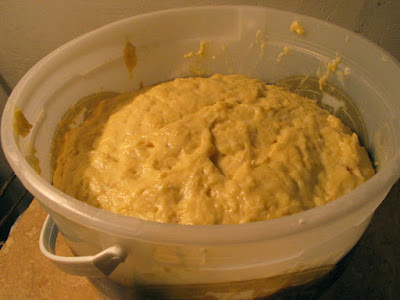 He has risen!
Allow dough to rest for 1 hr 20 minutes before baking.
Preheat oven to 350.
Using a pastry brush, brush the top of the loaf with egg wash (1 egg mixed with 1 tablespoon water).
Place the bread near the center of the oven and bake for 30-40 minutes, or until a golden brown.
Allow to cool.
EAT
Ok, I don't have a picture of this "loaf" because it's not very exciting, though it is still delicious. In the next few days I'll follow this up with some variations on the loaf recipe, mostly involving either cheese or chocolate so you know it's going to be good.
Strength and honor.
Ingredients:
1 1/2 cups lukewarm water
1 1/2 tablespoons granulated yeast
1 1/2 tablespoons salt
8 eggs, lightly beaten
1/2 cup honey
3 sticks of unsalted butter, melted
7 1/2 cups unbleached all-purpose flour
Recipe will yield about 4 lbs of dough. Feel free to half or quarter this recipe, though it will result in halving or quartering the amount of delicious bread you'll end up with.
 Brioche will make you healthy.
- 1. Mix the yeast, salt, eggs, honey, and melted butter with the water in a 5 qt bowl, or a lidded, but not air-tight, food container. I've been using old ice-cream buckets because they're the perfect size, i can punch a hole in the lid, and they don't take up as much room as a bowl in the fridge.

- 2. Measure out 7 1/2 cups of AP flour (or 2 lbs + 1 cup for those with scales).

Lifeless and kind of gross looking.
- 3. Mix in the flour without kneading, using a spoon or spatula (or a machine with a dough hook if you're some sort of robot-lover). Try to incorporate all of the flour, but don't over work the dough. I find a good spatula works best for this because you can scrape the sides and bottom of the bucket easily. The dough will be wet, loose, and lumpy.
 He has risen!
- 4. Cover (not airtight) and allow dough to rest at room temperature until dough rises, approximately 2 hours.
- 5. After initial rise put dough in the fridge until it is chilled through. Brioche is very very difficult to work with unless it is chilled. Dough will last in the fridge for up to 5 days. The dough will also freeze well, in 1 lb portions.
Brioche Loaf
If you just want to make a "loaf" of brioche, dust the top of the dough with flour and cut off a 1-pound (grapefruit sized) ball of dough. Dust the piece with more flour and quickly shape it into a ball by stretching the surface of the dough around to the bottom on all sides, turning the ball as you go. Then elongate dough, and place into a greased dough pan. You can also free - form this loaf on a baking stone, it wont rise as nicely though. Allow dough to rest for 1 hr 20 minutes before baking.
Preheat oven to 350.
Using a pastry brush, brush the top of the loaf with egg wash (1 egg mixed with 1 tablespoon water).
Place the bread near the center of the oven and bake for 30-40 minutes, or until a golden brown.
Allow to cool.
EAT
Ok, I don't have a picture of this "loaf" because it's not very exciting, though it is still delicious. In the next few days I'll follow this up with some variations on the loaf recipe, mostly involving either cheese or chocolate so you know it's going to be good.
Strength and honor.
Thursday, January 15, 2009
You should probably roast a chicken
After murdering a chicken 2 weeks ago attempting to make chicken adobo in a slow cooker, i decided I had to redeem myself by making the simplest of chicken dishes, a roast chicken...
Roasting a chicken is the epitome of minimalism in cooking, it can be as simple, or as complicated as you want it to be.
Necessary Equipment:


Seriously. That's it. You could probably add salt or something too.
Ok, what happened to those black speckled roasting pans that make an appearance every thanksgiving? You can use one if you want, but it's not necessary... preferable (at least for this recipe) is a heavy 12" cast iron skillet. If you don't own one, you should... they'll run you about $20 and they're practically indestructible, I cook everything but eggs in mine. The idea here is that the skillet gets preheated, and will sear and cook the slower-to cook dark meat on the bottom of the chicken faster, while the breast will cook slower, the skin will crisp, and it will keep all of it's juices.
The method, as stolen from Mark Bittman.
I personally used a honey, lime, and cumin glaze on mine and it turned out incredible. Here are a few glaze ideas.
Cumin, honey and Orange Juice: 2 tablespoons orange juice (I used lime juice as I had no OJ), 2 tablespoons honey, 1 teaspoon minced garlic, 2 teaspoons ground cumin, and salt and pepper.
Herb Roasted Chicken: 1/4 cup olive oil, 2 tablespoons chopped fresh parsley, basil, or dill, or marjoram.
Chinese style: Brush chicken with peanut or any neutral oil instead of olive. Half way through cooking brush over 1/4 cup soy sauce, 2 tablespoons honey, 1 teaspoon minced ginger, 1 teaspoon minced garlic, and 1/4 cup minced scallion.

Roasting a chicken is the epitome of minimalism in cooking, it can be as simple, or as complicated as you want it to be.
Necessary Equipment:


Seriously. That's it. You could probably add salt or something too.
Ok, what happened to those black speckled roasting pans that make an appearance every thanksgiving? You can use one if you want, but it's not necessary... preferable (at least for this recipe) is a heavy 12" cast iron skillet. If you don't own one, you should... they'll run you about $20 and they're practically indestructible, I cook everything but eggs in mine. The idea here is that the skillet gets preheated, and will sear and cook the slower-to cook dark meat on the bottom of the chicken faster, while the breast will cook slower, the skin will crisp, and it will keep all of it's juices.
The method, as stolen from Mark Bittman.
- Heat your oven to 450°. Five minutes after turning on the oven, put a cast iron or other heavy ovenproof skillet in the oven. (important, please don't throw your non-stick skillet with the plastic handle in the oven.. you know who you are) Rub the chicken with olive oil, and sprinkle with salt and pepper. This will promote browning of the skin. Even if you don't plan to eat the skin, keep it on while cooking to keep the juices in. You can also put things like herbs, lemon, or onions in the cavity if that's your thing. I went with onions. Contrary to the above picture, don't bother trussing the bird unless you really want to. It will cook faster, and you'll get better browning without trussing.
- When the oven and the pan are hot (15 min or so) take the pan out of the oven, and carefully put the chicken, breast side up, in the hot skillet. Seriously, be careful. This pan is like a 15 pound branding iron at this point. I had to use oven mitts as well as a small towel to get the pan in and out of the oven safely. Bake bird for 40-50 minutes, or until the meat in the thigh registers 155°-165°. It took me far less than that, closer to 35.. so I would really start to watch it past the half hour mark.
- When cooked through, take pan out of the oven and transfer bird to a platter. Cover loosely with foil and let it rest for at least 5 minutes. Letting meat rest is actually an important step, because if you cut into meat while it's still extremely hot, the juice will flow out of it. You want to keep all that goodness in, so let it cool and the juice will stay in the bird when you carve it.
I personally used a honey, lime, and cumin glaze on mine and it turned out incredible. Here are a few glaze ideas.
Cumin, honey and Orange Juice: 2 tablespoons orange juice (I used lime juice as I had no OJ), 2 tablespoons honey, 1 teaspoon minced garlic, 2 teaspoons ground cumin, and salt and pepper.
Herb Roasted Chicken: 1/4 cup olive oil, 2 tablespoons chopped fresh parsley, basil, or dill, or marjoram.
Chinese style: Brush chicken with peanut or any neutral oil instead of olive. Half way through cooking brush over 1/4 cup soy sauce, 2 tablespoons honey, 1 teaspoon minced ginger, 1 teaspoon minced garlic, and 1/4 cup minced scallion.

This was my result. I got 5 sandwiches, and 1 (big) meal out of this 4 lb bird. All for about $5.
Somehow I've managed to post 3 chicken recipes out of my total less-than-a-dozen blog posts, so I'm going to try to move away from that. Look for a more interesting, and more delicious brioche post by next week.
Somehow I've managed to post 3 chicken recipes out of my total less-than-a-dozen blog posts, so I'm going to try to move away from that. Look for a more interesting, and more delicious brioche post by next week.
Hot new format
A hot new format means a hot new update is coming... possibly hot ham water? Check back to find out.
Also, I've determined that the chances of me posting any content that deals with politics, religion or anything of substance is exactly 0%, so don't wait for that. It's all about the food.
To tide you over here is a picture of what happened the night of my 27th birthday. Too bad the mariachi band didn't make it into the picture.

Monday, January 12, 2009
Mini Spanakopita
So despite working 55+ hours a week, and attempting to study for my GRE I'm still somehow finding time to cook.. you prioritize what you love I guess. In an effort to get away from the chunk of protein + veg meals I've been posting here is a quick and delicious appetizer that I made recently and brought in to work. I bring a lot of things into my job because I love to try new recipes.. and what else do you do with pounds of guilty pleasure food but give it away?
I usually measure the sucess of my recipes by how fast they disappear in the morning to my co-workers.. for instance, the last time I brought in some healthy oatmeal - rasperry muffins, I ended up taking some home - clearly a failure (for the record, I thought they were awesome, and I was glad to have breakfast for the next few days). These on the other hand, were gone by 11am... pretty much a resounding success, especially for the new-years resolution filled days of the early new year.
Ok so we've gotten it out of the way that these aren't exactly health food.. not that it will stop you from eating about 10 of these. Puff pastry, cheese, and spinach.. is there anything better?
Ingredients:
1 package puff pastry
1 small container feta cheese
8 oz frozen spinach
16 oz ricotta cheese
1 red onion, sliced and diced very small
salt and pepper to taste
A note on puff pastry since I know a few non-cooks that read this: This stuff is available in pretty much any grocery store in the frozen section, usually near the frozen pie crusts and the like. A common brand is Peppridge farms, but there are others out there. It's pretty much impossible to make yourself, so save yourself the trouble and go buy some. Let it thaw out a little before you use it so that it opens easily, without cracking. However, watch that it doesn't thaw too much or it may not puff up like it should.. it's basically layered butter, and if it thaws out the layered structure will collapse. If it seems to be getting too limp, just throw it in the freezer for a few minutes.

- 1. take the puff pastry out of the fridge to thaw while you start on the filling.

- 2. Thaw the spinach in the microwave. wrap the thawed spinach in a paper towel and squeeze out the excess water. Place spinach in a large bowl, and slowly mix in the feta, the onion and ricotta cheese. You don't need to use all the cheese, just mix it until you like the taste and consistency. Use more feta if you want a more salty bite to it, or more ricotta if you prefer it more creamy. Add salt and pepper to taste.

- 3. unroll the thawed puff pastry on a work surface and cut into 24 squares. press the squares into cupcake tins and fill with the spinach and cheese filling. I used a pizza cutter for this, but a knife would work fine too.
4. bake at 350 F for about 15 minutes or until the puff pastry cups are golden brown. For best non-stick results, lightly grease or spray the muffin tins before you bake.. the bottoms of mine stuck to the tin, and they're hard to get off without tearing them apart.

Taste: 10/10; there's no question that these are awesome.. especially warm.
Ease of preparation: 9/10: Very very easy... they only way to kill these things would be to over bake them, so watch them carefully.
I roasted a chicken today so that will be on the way soon. Hooray for big chunks of animal protein. I'm still working on the lighting situation, the pictures look nowhere near as good as I want them to right now. It doesn't help that I have a really ugly, cluttered counter.. but that's the life of a renter.
Friday, January 9, 2009
Oven "Fried" Chicken
This recipe comes out of Mark Bittman's "How to cook everything", my new favorite cookbook.
The idea behind this recipe is to get the crunch of fried chicken, without the hassle or artery-clogging effects of deep frying, or stopping at your local Popeye's fried chicken. Also, there's less of a chance you'll be stabbed while making this chicken than visiting Popeye's.
Because the recipe is so simple, it allows for any elaborations or substitutions that you might want. The three main ingredients are some form of protein, bread crumbs, and some sort of sticky medium to bind the bread crumbs.
Directly from the book:
1 cup buttermilk
1 teaspoon paprika (optional)
1/2 teaspoon cayenne, or ground black pepper
1 1/2 teaspoons salt
1 whole chicken, 3 to 4 pounds trimmed of excess fat and cut into pieces, or assorted chicken parts.
2 cups panko or fine bread crumbs.
Recipe Modifications: I didn't have any buttermilk, so I substituted 1 egg blended with a tablespoon of water as the book suggests. I used smoked Spanish paprika which is to me not an optional ingredient, but I replaced the cayenne with 1 teaspoon of smoked black pepper. For the chicken I just used a package (6) boneless skinless chicken thighs, because a) they're cheap and b) dark meat is best. Feel free to substitute skinless breast if you want extra healthy, or to cut up a whole chicken yourself (cheap, but messy). I also added chopped cilantro to the breadcrumbs, but this is by no means necessary.
Panko is a Japanese style of breadcrumb, made from the crumb of the bread rather than the crust. It's also crushed very fine.. don't try to use those big stuffing breadcrumbs. Panko should be available at most grocery stores (I got it at Target).

(the green bits are chopped cilantro, optional)


The idea behind this recipe is to get the crunch of fried chicken, without the hassle or artery-clogging effects of deep frying, or stopping at your local Popeye's fried chicken. Also, there's less of a chance you'll be stabbed while making this chicken than visiting Popeye's.
Because the recipe is so simple, it allows for any elaborations or substitutions that you might want. The three main ingredients are some form of protein, bread crumbs, and some sort of sticky medium to bind the bread crumbs.
Directly from the book:
1 cup buttermilk
1 teaspoon paprika (optional)
1/2 teaspoon cayenne, or ground black pepper
1 1/2 teaspoons salt
1 whole chicken, 3 to 4 pounds trimmed of excess fat and cut into pieces, or assorted chicken parts.
2 cups panko or fine bread crumbs.
Recipe Modifications: I didn't have any buttermilk, so I substituted 1 egg blended with a tablespoon of water as the book suggests. I used smoked Spanish paprika which is to me not an optional ingredient, but I replaced the cayenne with 1 teaspoon of smoked black pepper. For the chicken I just used a package (6) boneless skinless chicken thighs, because a) they're cheap and b) dark meat is best. Feel free to substitute skinless breast if you want extra healthy, or to cut up a whole chicken yourself (cheap, but messy). I also added chopped cilantro to the breadcrumbs, but this is by no means necessary.
Panko is a Japanese style of breadcrumb, made from the crumb of the bread rather than the crust. It's also crushed very fine.. don't try to use those big stuffing breadcrumbs. Panko should be available at most grocery stores (I got it at Target).
- 1.Heat the Oven to 400 F. Mix the buttermilk, paprika, cayenne, and salt in a large bowl. Add the chicken and let it soak a few minutes, coating it completely. Meanwhile put the breadcrumbs in a shallow dish or large bowl and brush a baking sheet with oil or cover it in foil.

(the green bits are chopped cilantro, optional)
- 2.Remove the chicken from the bowl a piece at a time and coat in the bread crumbs. Place the coated chicken on the baking sheet, leaving at least an inch between pieces.


- 3.Bake the chicken until the exterior is golden brown and the chicken is done through. 30-40 minutes. This took me 30 minutes, it's going to depend on the size and cuts of chicken you use. Make sure you check them regularly. There is no need to flip them, they'll cook evenly without it.

I served this over spinach, with balsamic and olive oil, with a side of mushrooms and garlic.
Rating:
Taste: 10/10 This is excellent! While it's not going to fool you into thinking it's real fried chicken, it retains what I think are the best things about fried chicken, a crunchy exterior, and very moist flavorful meat. The chicken thighs worked really well, but using bone-in, skin-on chicken would add even more flavor. The true success in this recipe lies in the fact that it's not a weak substitute for deep frying, but good in different ways.. it's not greasy!
Ease of preparation: 9/10: This recipe is going to take you about 50 minutes to make, but considering 30 of those minutes are in the oven, it's an easy recipe to throw together. The small number of ingredients, most of which you can substitute help this recipe out here. A small tip I have is to use a bowl for the panko, and not a shallow dish. I was trying to be careful with the breading, but still managed to get bread crumbs everywhere.
Thursday, January 8, 2009
Update?
In an effort to make this blog suck less I've decided that I'm going to start posting more often (or would that make it suck more?). I've continued to cook every day of two, but I rarely photograph it because I don't have enough light in my kitchen in the winter. I've mostly solved that problem by getting a new camera for Christmas, and by digging an old desk lamp out of my closet.. so it's not perfect, but at least I can post again.
I also recently purchased the book "How to cook everything" by Mark Bittman, and I've got to say that if I could only keep one cookbook from my collection, this would be the one. From techniques I've never used, to simple recipes that suit my cooking style (cheap & fast) I'll probably be getting a lot of use out of it.
I totally killed chicken adobo yesterday by overcooking it, it was a sad day. However look for a post on making delicious mini spanakopita things soon.
Subscribe to:
Posts (Atom)

